Have you ever felt a spark of joy while crafting something beautiful with your hands? Ribbon embroidery combines the elegance of fabric art with the charm of ribbon, creating stunning pieces that can brighten your home or make unique gifts for loved ones. This beginner’s guide will help you navigate the vibrant world of ribbon embroidery, from gathering supplies to refining your skills. Whether you’re a seasoned crafter looking to try something new or a newbie ready to dive into a colorful artistic venture, this guide is your roadmap to success.
Discover the Joy of Ribbon Embroidery: A Beginner’s Guide
Ribbon embroidery is a delightful form of needlework that utilizes ribbons instead of traditional threads. With its bold colors and various textures, this art form allows you to express your creativity in ways that traditional embroidery may not. The result is often eye-catching floral designs, intricate patterns, or even personalized motifs that truly reflect your style. As a beginner, you’ll find that ribbon embroidery is both rewarding and accessible, making it a perfect choice for anyone looking to explore their artistic side.
One of the most appealing aspects of ribbon embroidery is its versatility. You can embellish anything from home décor items like pillows and table runners to personal accessories such as bags and clothing. As you embark on this creative journey, you’ll discover how soothing and satisfying it is to see your vision come to life, stitch by stitch. With a little patience and practice, you’ll soon find yourself immersed in a world where your imagination knows no bounds.
Moreover, the community around ribbon embroidery is warm and welcoming. As you learn and grow, you’ll connect with fellow enthusiasts who share tips, inspiration, and a deep appreciation for this beautiful craft. So, gather your supplies, get comfortable, and prepare to embrace the joy of ribbon embroidery!
Gather Your Supplies: Essential Tools for Newbies
Before you dive into the world of ribbon embroidery, it’s essential to gather the necessary supplies. Starting with the basics will set you up for success and ensure a smooth crafting experience. Begin with a selection of ribbons in various colors and widths; satin ribbon is a popular choice for its sheen and ease of manipulation. You’ll also need a needle specifically designed for ribbon embroidery, which typically has a larger eye to accommodate the thickness of the ribbons.
Next, invest in a good pair of embroidery scissors. Sharp scissors will help you achieve clean cuts, which is particularly important in ribbon work. Fabric hooped frames are also beneficial, as they hold your fabric taut and make stitching easier. Lastly, don’t forget to have a pen or pencil for marking your designs, along with an embroidery pattern book or printed designs to guide your creativity.
With your tools in hand, you’re ready to embark on your ribbon embroidery journey. Remember, the right supplies can greatly enhance your experience and keep frustrations at bay, allowing you to focus on the joy of creating.
Choosing the Right Ribbon: Types and Textures Explained
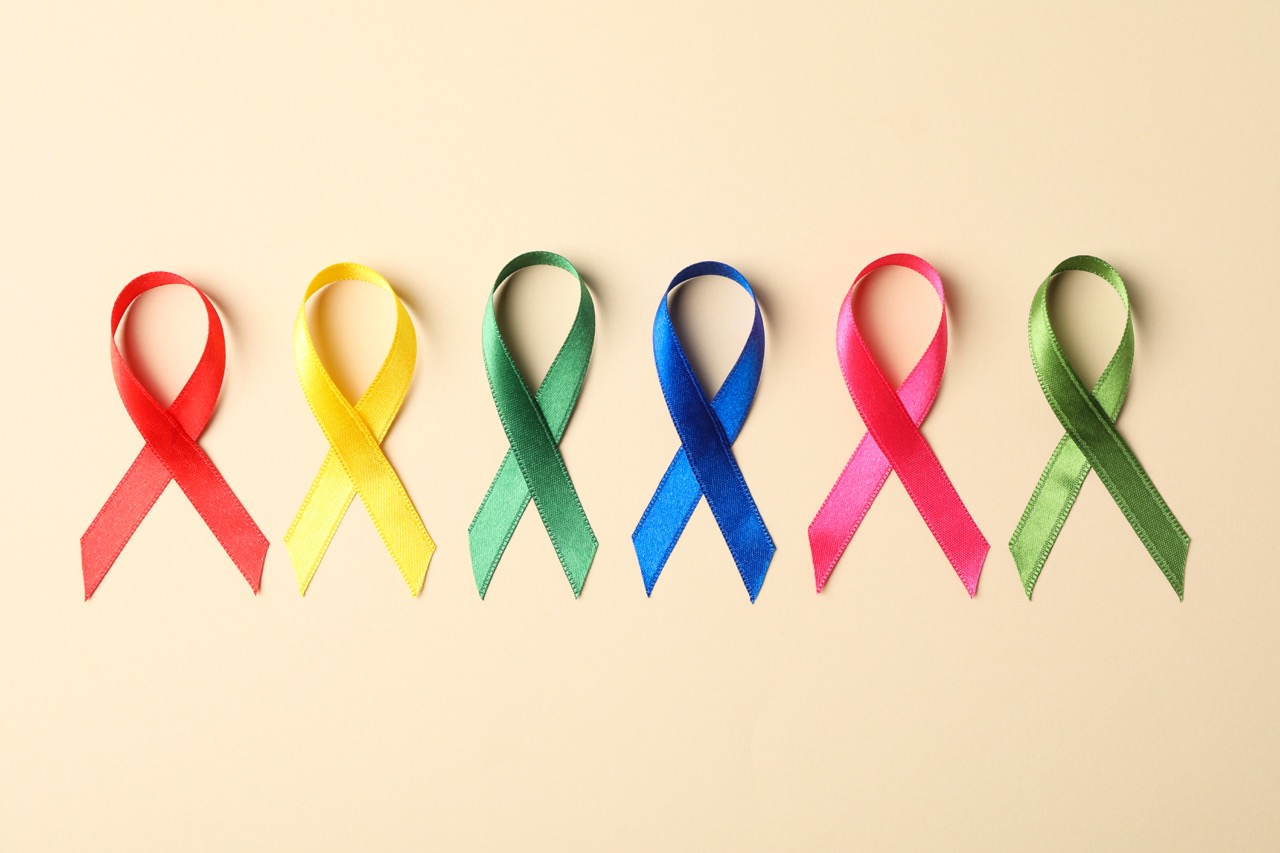
In ribbon embroidery, the type and texture of your ribbon can dramatically influence the final appearance of your work. Different materials yield various effects; for example, satin ribbons create a smooth, shiny finish, while organza offers a more delicate, translucent look. Additionally, grosgrain ribbons have a textured surface, lending a unique character to your designs. Exploring different types of ribbons will not only enrich your creations but also help you discover which styles resonate with you.
When selecting your ribbons, consider their width as well. Wider ribbons are fantastic for bold designs and larger stitches, while thinner ribbons work well for intricate details and delicate motifs. Don’t hesitate to mix and match different widths and materials within the same project; this adds depth and dimension to your embroidery piece. Experimentation is key!
Moreover, as you gain confidence in your skills, you may want to explore specialty ribbons, such as printed or hand-dyed options. These can elevate your projects to new heights and encourage you to push the boundaries of your creativity. As you navigate this vibrant world, remember that the beauty of ribbon embroidery lies in the endless possibilities awaiting your artistic touch.
Picking the Perfect Fabric: What Works Best for Beginners?
When starting your ribbon embroidery journey, the choice of fabric is crucial. Opt for a medium-weight cotton or linen fabric, as these materials provide a sturdy yet forgiving foundation for your stitches. They hold up well under the needle and give your ribbons a strong surface to adhere to, making them ideal for beginners. Additionally, these fabrics are easy to work with and can be found in a variety of colors and patterns, allowing you to express your style right from the start.
As you become more comfortable with your techniques, feel free to explore other fabric options. Experimenting with different textures like canvas or silk can open up new avenues for creativity. However, always remember to pre-wash and iron your fabric to avoid any surprises later on, such as shrinkage or wrinkles that could affect your finished piece.
Furthermore, consider the scale of your project when selecting fabric. A larger piece might require more intricate designs, while smaller projects provide a perfect canvas for quick, satisfying stitches. Be mindful of the fabric’s weave as well, as tighter weaves will hold the ribbons more securely. Ultimately, choose a fabric that speaks to you, and let it serve as the backdrop for your artistic journey into ribbon embroidery.
Mastering Basic Stitches: Your First Steps in Embroidery
As you embark on your ribbon embroidery journey, mastering a few basic stitches will lay a strong foundation for your skills. Start with the most common stitches like the ribbon stitch, which involves weaving the ribbon through the fabric to create lovely flower petals. The lazy daisy stitch is another beginner-friendly option, perfect for creating delicate floral designs. With each stitch, you’ll gain confidence and experience, paving the way for more complex techniques later on.
Practice is essential; don’t be discouraged if your first attempts don’t turn out as expected. Set aside time to experiment with each stitch, allowing your fingers to become familiar with the motions. You might consider creating a small practice sampler, where you can test out different stitches, colors, and techniques. This will help you visualize how your chosen designs can come together cohesively.
Once you’ve mastered the basics, you’ll find that combining stitches can lead to stunning results. For instance, you can complement ribbon flowers with lazy daisy leaves or create intricate patterns by layering different stitches. Remember, the key to success in embroidery is practice, patience, and an open mind to learn from every experience.
Creating Stunning Designs: Inspiration for Your Projects
As you hone your ribbon embroidery skills, finding inspiration for your projects can fuel your creativity and keep you motivated. Start by exploring nature; flowers, leaves, and landscapes can provide a wealth of ideas for your designs. Consider sketching out your ideas or taking photographs of botanical beauties, which can serve as a reference for future projects. You might also find inspiration in traditional embroidery patterns or even modern art; there are no limits to where your imagination can take you!
Online platforms like Pinterest and Instagram are treasure troves of ribbon embroidery inspiration. Search for hashtags related to ribbon embroidery to discover stunning pieces created by other crafters. Consider following embroidery artists whose styles resonate with you; their work can help ignite new ideas and techniques you might want to incorporate into your own projects.
Additionally, creating themed pieces can enhance your experience. For example, you could design a series of seasonal decorations, such as a spring floral wreath or autumn leaves, which can be enjoyed year after year. Ultimately, the most important aspect of creating stunning designs is to have fun and let your creativity flow. Every stitch is an opportunity to express your unique artistic voice!
Techniques for Success: Tips to Enhance Your Skills
To elevate your ribbon embroidery skills, consider adopting a few techniques that can enhance your overall experience. One effective tip is to ensure your ribbons are cut at an angle before threading them through the needle. This simple step minimizes fraying and allows for smoother stitching. Additionally, always use a sharp needle and keep your work area well-lit to make the process more enjoyable and precise.
Practicing proper tension can also significantly impact the appearance of your work. Avoid pulling your ribbons too tightly or leaving them too loose; both extremes can lead to puckering or an uneven finish. As you stitch, take a moment to step back and assess your progress; this will help you identify areas that may require adjustment before moving forward.
Lastly, never underestimate the power of patience. Ribbon embroidery is a leisurely art form, so give yourself permission to take breaks when needed. Allowing time for your mind to rest can lead to fresh ideas and renewed excitement for your projects. Remember, each piece you create is a stepping stone on your artistic journey, and every stitch contributes to your growth.
Troubleshooting Common Issues: Don’t Let Mistakes Discourage
Every embroidery journey comes with its fair share of challenges, but don’t let mistakes discourage you! One common issue beginners face is ribbon fraying. To prevent this, always cut your ribbons at an angle and consider applying a tiny dab of fray-check solution to the ends. If you do encounter fraying during your project, simply trim the damaged section and continue stitching—sometimes, these "mistakes" can lead to unexpected creative solutions!
Another frequent problem is uneven tension, which can lead to puckered fabric or uneven stitches. If you notice this happening, take a moment to evaluate how tightly you’re pulling the ribbon. Practicing on a scrap piece of fabric can help you find that sweet spot of tension that results in smooth, beautiful lines. Remember that imperfection is part of the artistic process; embrace the uniqueness of each piece you create!
Lastly, if you find that your ribbons aren’t laying flat, consider using a little fabric glue to help secure them in place as you stitch. This technique can be especially helpful for larger projects or intricate designs. Always remember that challenges are opportunities for growth, and each project you complete will teach you something new to carry forward in your ribbon embroidery journey.
Finishing Touches: How to Wrap Up Your Embroidery Piece
Once you’ve completed your ribbon embroidery masterpiece, it’s time to focus on the finishing touches that will truly elevate your work. First, gently press your piece using a steam iron set on a low heat to remove any creases. Be cautious around the ribbons, as excessive heat can cause them to melt or lose their shape. Placing a thin cloth between the iron and your embroidery can help protect your work.
Next, consider framing your piece or incorporating it into a larger project, such as a pillow cover or wall hanging. Choosing the right frame can enhance your design and allow it to shine. If you opt for a frame, make sure it complements the colors and style of your embroidery. Alternatively, if you’re incorporating your piece into a functional item, take care to secure the edges neatly to ensure durability.
Finally, don’t forget to sign your work! Adding a small tag or signature to your embroidery not only personalizes it but also marks the journey of your creative expression. Whether you gift it to someone special or hang it in your own home, these finishing touches will ensure that your ribbon embroidery piece stands out and showcases the love and effort you put into creating it.
Caring for Your Ribbon Embroidery: Maintenance Made Easy
Once your ribbon embroidery is complete, it’s important to know how to care for it properly to ensure its longevity. Start by keeping your piece out of direct sunlight to prevent fading over time. If your embroidery is framed, consider using UV-protective glass to shield it from harmful rays while still allowing it to be displayed beautifully.
Regular dusting will also help maintain the vibrancy of your ribbons. Use a soft cloth or a feather duster to gently remove dust particles. If your embroidery requires deeper cleaning, consult the care instructions for the specific fabrics and ribbons you used, as some materials may be more delicate than others. Spot-cleaning is typically the safest method for ribbon embroidery, using a damp cloth and mild detergent to treat any stains.
Finally, when storing your ribbon embroidery, avoid folding it to prevent creases and damage. Instead, consider rolling it gently around a cardboard tube or keeping it flat in a protective container. With a little care, your ribbon embroidery can be cherished for years to come, becoming a treasured heirloom that showcases your creativity and artistry.
Expanding Your Skills: Next Steps After the Basics
Once you’ve mastered the basics of ribbon embroidery, the world of advanced techniques and projects awaits you! Consider exploring more intricate stitches and combining various stitches to create complex designs. Look into advanced patterns that challenge you, such as landscapes or mixed-media projects, which can incorporate beads, sequins, or even other forms of embroidery.
Joining workshops and classes, whether in-person or online, can offer valuable guidance and introduce you to new techniques. Many crafting communities provide courses tailored for various skill levels, allowing you to learn at your own pace while connecting with fellow embroidery enthusiasts. These classes can also help you discover specialized techniques like 3D ribbon work or dimensional flowers, adding depth to your creations.
Finally, consider sharing your journey with others. Documenting your work through social media or starting a blog can provide great encouragement and foster connections with other crafters. By showcasing your completed pieces and the skills you’ve learned, you not only celebrate your achievements but inspire others to embark on their own creative journeys in the world of ribbon embroidery.
Join the Community: Finding Support and Inspiration Online
In the digital age, connecting with fellow ribbon embroidery enthusiasts has never been easier. There are countless online communities, forums, and social media groups dedicated to embroidery where you can share your work, seek advice, and participate in challenges. Platforms like Instagram and Facebook offer vibrant spaces to showcase your creations using relevant hashtags, allowing you to discover the work of others and gain inspiration from diverse styles and techniques.
Joining online crafting platforms or forums can also provide you with valuable resources, including tutorials, videos, and pattern downloads. Many experienced embroiderers share their tips and tricks, helping beginners navigate the learning curve more easily. Engaging with these communities can enhance your skills and foster friendships with like-minded individuals who share your passion for this beautiful art form.
Moreover, don’t hesitate to participate in local crafting events or workshops. Many communities host embroidery clubs where you can learn from experienced artisans and meet fellow crafters in a supportive and encouraging environment. Remember, the world of ribbon embroidery is not just about creating art; it’s also about building connections, sharing experiences, and growing together as a community.
Embarking on your ribbon embroidery journey opens a world filled with creativity, expression, and connection. As you gather your supplies, explore different techniques, and share your work with others, you’ll not only enhance your skills but also discover the joy and satisfaction that comes from creating something beautiful. Remember, every stitch contributes to your artistic growth, and every project is an opportunity to learn and experiment. Embrace the process, find inspiration in your surroundings, and, most importantly, enjoy each moment spent crafting with ribbon. Happy stitching!